How To Make Your Squats Better And Pain Free!
Squats is an area that requires a good base of knowledge and understanding. Unfortunately it’s not an area that gets much (if any) decent attention to detail for such a common movement that is performed in everyday life, and at all ages.
Firstly, this article is for individuals to;
- Understand proper technique and how to individualise it to work for you.
- Perfect the proper technique to suit you and your body’s structure and capabilities.
- Modify the movement for yourself if you may be dealing with specific injuries or restrictions.
Secondly, as a disclaimer, injuries are “multifactorial” and can result from internal and external factors. And also, the “perfect technique” can never 100% guarantee no injury.
Right so with that out of the way, lets get to the real business at hand.
This is a 4 part outlook into making your squats better.
Part 1: The Anatomy
The squat, believe it or not, is a whole body exercise, working from head to toe. If there is a weak link in the chain between the head and toe, the squat will be a lot more difficult to perform.
In the squat, we have primary or targeted muscles.
- The quadricep muscles are primary muscles that are used in a squat, and they help us extend our knees, or in other term, straighten our knees. This helps us with the ability to stand tall at the top of the movement.
- The glute maximus muscles are another primary muscle that are used in a squat, and they help us extend or straighten our hips. This helps us when our hips flex or bends at the bottom of the squat and the glute maximus drives us up to straighten up at the top of the movement.
In the squat, we also have secondary or synergist muscles.
- Hamstring muscles are secondary muscles that are used in a squat, and they help us absorb force in the eccentric or lowering portion of the squat so that we can remain stable and assist the primary muscles in producing force by extending the hips to complete the movement.
- Adductor muscles are secondary muscles that are used in a squat, and they help us absorb force in the eccentric or lowering portion of the squat, allowing us to open our hips more to absorb and produce more force whilst also assisting in stabilizing the pelvic region and assist the primary muscles in producing force by extending the hips to complete the movement.
And than finally we have stabiliser muscles.
- There are a lot of muscle that help stabilises the body during the squat. Notable mentions go to the Glute Medius as the Glute Medius helps us externally rotate our femur and therefore opening up and stabilising the hips and pelvis to help absorb and produce force to complete the movement.
- Next mention of stabilisers that assist a squat movement are the back and core muscles. These group of muscles assist from the hips through the upper body to remain stable and controlled during the movement.
Part 2: The Realistic Set Up
Realistically, squatting technique is influenced by a myriad of individual factors which will be talked about as this article progresses.
Stance:
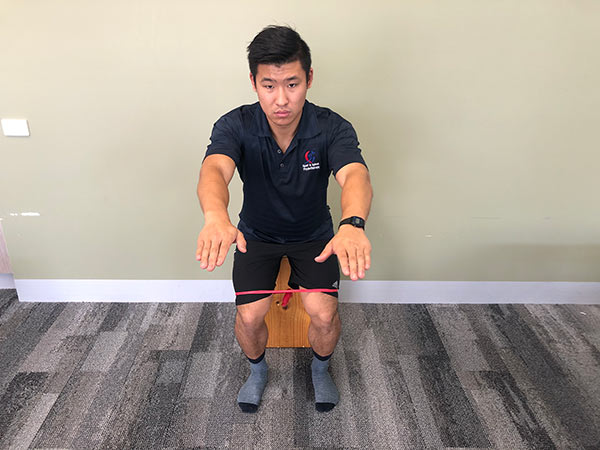
To determine which stance will be optimal for you, simply perform a bodyweight squat in various stances. From there, determine which one is optimal for you and has minimal to no pain during the squat. This can be done with toes pointing forward or toes pointing slightly out and then from there, determining which one gives you your deepest squat, pain free.
Spinal Position:
Back position is a controversy topic whether a straight and neutral back is more beneficial than a back position that is fixed in a slight flexed position. Depending on comfortability, injury history and range of motion, either position is suitable if it works for you.
Elbow and Wrist:
This is more for barbell back squats. The positioning of where we place our hands is all determined on our thoracic and shoulder complex range of motion. The better our thoracic and shoulder complex range of motion is, the closer we can have our hands to our body. Once you can determine the placement of the hands, stack the elbows under the wrist. From there, push the elbows back to help lock the barbell into place on our upper back.
Related article: How to Warm Up to Prepare You to Perform at Your Best
Part 3: The Cues
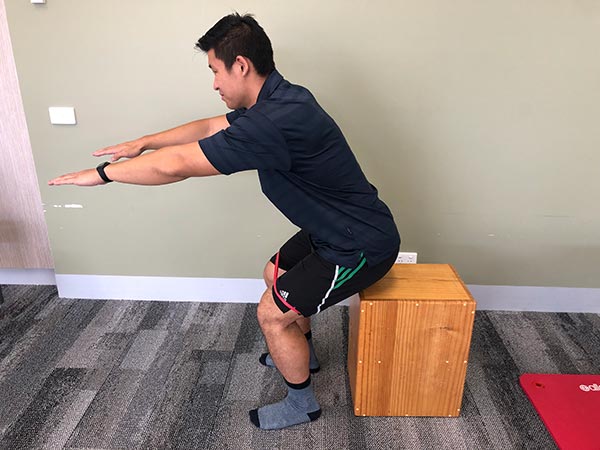
Aim For Knees Over Toes:
Here we are aiming for knees to be pushed forward and over our toes. This allows us to not sit back into our squats and make it a more hip dominant movement. When we want to promote pushing the knees forward, creating unification between the hips, knees and ankles to complete the movement.
Knees Caving In:
When our knees cave in (valgus), this is not an ideal concept to create. But it is not going to increase your risk of injury. Knees caving in, we generate more force by using our hips and pelvis to push that force that we created in the eccentric phase to help us stand up from a squat.
Keep Ribs And Pelvis Stacked:
This helps in squats when individuals are too “chest up” and causing hyperextension in the spine and creating pinch points. I like to emphasis that where the head looks, the body follows. So if we are looking directly in front of us, we are going to stick up our chest more. This will make us feel like you are going to fall backwards. And if you look directly down at your feet, you are going to feel like you are going to fall forward. Find a spot where it’s a meter or two in front of you on the floor and use that as a guide.
Plant Your Feet:
When we plant our feet into the ground, we don’t want to be in an unbalanced situation. Where it throws us off and potentially cause us more harm. So, we like to treat it by thinking that we want to create even pressure throughout the foot. To do this, placing our big and little toe down hard into the floor and drive our heels into the ground. This will keep our center of mass through the middle of the foot to create stability.
Side Note: Not all cues will work for everyone. Even though external cues are well established as superior. Internal cues (i.e. chest up, knees out) do have a time & place. If the external cues aren’t working. The intent of this article is to give you some different options to work with. And from there, so you can adjust based on what work with you. Along with your own experience of what does and doesn’t work.
Part 4: How To Create Change For Any Pain Or Injury In Squats
As a disclaimer, all injuries are different and need to be managed on a case by case basis. Most injuries or pain in squats are usually cause by either;
- Technical Issues.
- Your Squatting Load Is WAY More Than Your Squatting Capacity.
Squat Modifications
Here are some of the most common modifications that can be made to help individuals squat through various injuries:
- Shoulder Pain: Shoulder pain usually comes from tight and reduced range of motion through the whole shoulder complex and thoracic spine. Having appropriate shoulder external rotation range of motion, loose pectorals and thoracic extension can help with this issue.
- Wrist Pain: Wrist pain is typically due to a substantial strain and load running through the wrist. Adjusting your grip on the barbell and having the weight carried by the body and not the wrist will reduce this issue.
- Back Pain: Back pain usually is a result of the following 3 problems;
- Flexion: Having some spinal flexion is perfectly fine if it is in a fixed position. But excess flexion of the spine can cause the load of the squats to the lower back and less through the hips.
- Extension: Individuals tend to be scared to flex the spine. Because of this, individuals tend to find themselves extending their back and then creating pinch points on the vertebrae’s when squatting. Creating the individual to have poor awareness of this happening. By cueing pulling the ribs down slightly (not rounding) will help reduce this issue.
- Compression: Sometimes compressing the vertebrae’s is uncomfortable for individuals. It can be a load tolerance where it is more than their current capacity. Or the individual just can’t tolerate any given load on the back. So using alternative squat variations like a goblet squat can be good substitute with.
- Hip and Knee Pain: Hip and knee pain is common when range of motion and correct stance isn’t obtained. Usually due to muscle weakness in either the quadriceps, hamstrings, or the glutes that stop us from increasing our range of motion.
- Ankle Pain: Ankle pain is usually caused by reduced range of motion where we are pushing the tibia forward. Causing the tibia to collide with our anterior ankle bone structures. Appropriate footwear, like anything that is flat shoes, not runners, can help with ankle pain.
For more info: https://www.physio-pedia.com/Squat_Exercise